The Bloom WordPress plugin is one of the best tools for converting website visitors into email subscribers.

With ever-changing search engine algorithms, email outreach is one way you can guarantee targeted traffic to your blogs and business's website. With a quality email list, you can bring users back to your site every time you publish a new piece of content.

If you're not currently focused on collecting emails on your website, Bloom can help you get started in style. Keep reading to learn how.
Bloom Review Overview
Bloom makes it easy to set up an opt-in form for your WordPress site and start collecting email addresses. With this plugin, you can ensure that your forms are properly set up in the back end and presented it in a professional way on the front end so they become fruitful lead generators.
Without an email opt-in plugin like Bloom, you'd need to manually make sure that your subscription form is visible to every user, properly connected to your email marketing service, set to the proper pop-up timing, optimized for mobile, and complete with a powerful call-to-action. This would likely require lots of time, resources, and money.
That explains the benefits of using an email opt-in plugin general, but there are plenty of different WordPress plugins that can help. So why should you use the Bloom plugin?
Why Use Bloom?
The answer is in the design of the plugin and how it works. Nowadays, your website's design needs to be as modern as the tools you use to manage that site. The Bloom WordPress plugin offers you several different design options to choose from and you have complete control over the placement of the form.
You won’t find the quality or the number of features that Bloom has to offer in a free plugin. If you're serious about your online business, it's a good idea to spend some money on tools like Bloom that can bring in a great return on investment.
Because this plugin is created by an experienced and trusted team, you can expect Bloom to stay up-to-date with the latest trends, too.
Getting Started With Bloom
The Bloom user interface is incredibly powerful and easy-to-use, even for a newbie.
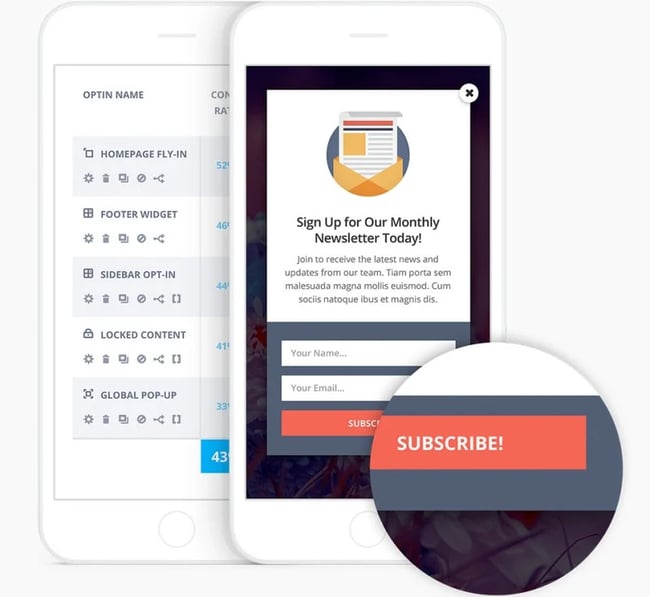
Once you activate the plugin, you can start setting up your email opt-in form using the Bloom interface. The plugin comes with an intuitive dashboard where you can define how you want this plugin to work on your site.
You can also use this dashboard to analyze the conversion rate of the opt-in forms. And with analyzation tools, you're able to see if your forms are generating leads. If not, you have the option to make adjustments to make a bigger impact.
If you'd rather watch a video to learn how to get started with the Bloom plugin, check out this walkthrough from WP Venture:
Bloom Opt-in Display Types
- Automatic opt-in pop-up
- Automatic opt-in fly-in
- Inline opt-in forms
- Below content opt-in forms
- Widget area opt-in forms
- Locked content opt-in forms
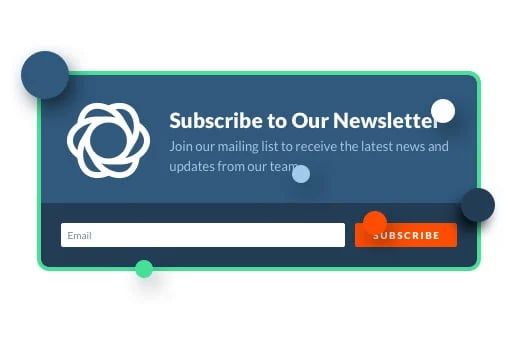
1. Automatic Opt-In Pop-Up
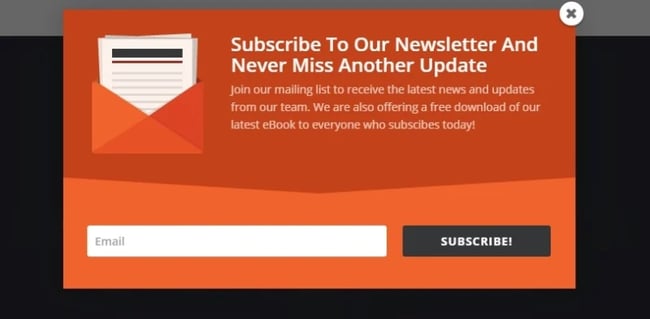
Although it might sound like an annoyance for your visitors, pop-up forms are actually popular and quite effective. Plus, Bloom provides useful settings to trigger the pop-up forms so they aren't a nuisance.
The pop-up can be triggered by setting up a timer. You can also trigger it when a user scrolls a certain percentage down the page, reaches the bottom of a post or page, leaves a comment, makes a purchase, or is inactive for a specified period of time.
2. Automatic Opt-In Fly-ins

Like pop-ups, fly-in forms can be triggered by user interaction, like scrolling behavior or inactivity.
Fly-in forms are another great way to grab the user's attention, but they are considered less intrusive than pop-ups because they appear in the lower right corner of the screen.
3. Inline Opt-in Forms

Inline opt-in forms are embedded within your content, which makes them ideal for converting visitors who are already interested in your content.
With Bloom, you just configure your form, generate its shortcode, and copy and paste it anywhere on your site.
This opt-in display is often combined with others, like the below content opt-in form and require opt-in to unlock content.
4. Below Content Opt-In Forms

As the name suggests, the below content opt-in form is placed at the end of a blog post or web page. Like the inline form, it's a high-converting placement option because it targets users who are already interested in your content.
It also doesn't interrupt the user's reading experience so it won't risk annoying or frustrating your readers. In fact, if a user likes a particular piece of content on your website — so much so that they read the whole thing — they'll likely appreciate the invite to keep consuming your content.
5. Widget Area Opt-in Forms

The widget area opt-in form allows you to place forms in the sidebar or footer of your website. These locations are considered a sweet spot for forms: they're highly visible, but don't interrupt the reading experience.
They can also be configured globally to appear in the sidebar and/or footer of every page on your website.
6. Locked Content Opt-in Forms
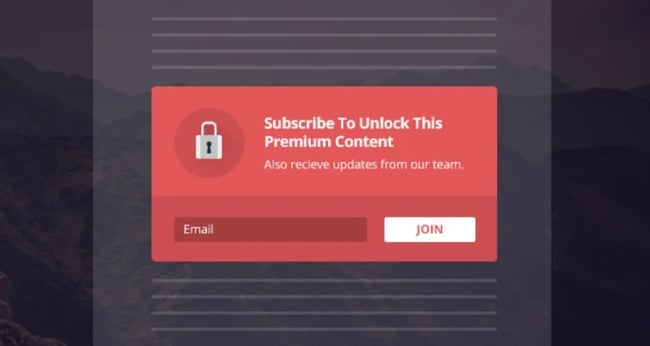
Bloom offers you the option to lock your content and require users to share their email addresses before they get access to the piece of content.
You can play around with the customization and when to trigger this form, perhaps allowing enough time for a user to read a few sentences of your content before they are locked out. You can also restrict some content while enabling other content.
This type of opt-in form can be incredibly effective, especially if the locked content is high-quality and valuable. In that case, you'll easily capture your visitors' interest and convince them to join your subscription email list.
Automatic Triggers
Bloom comes with six trigger options for pop-up and fly-in email opt-in forms. Let's look at them in detail below.
1. Timed Delay
If you set up the timed delay option to trigger the form, users will see the opt-in email form after a defined period of time spent on the page. The logic is that if a user spends a certain amount of time on your site before the form is triggered, the user probably finds your content interesting and useful, which increases the chance of conversion.
2. Bottom of Post
With this trigger option, a user scrolls through the entire post, and at the end, is greeted with an email opt-in form. Since the user has read the entire piece of content, they are likely to subscribe to emails to ensure they can access and read more of your content.
3. After Scrolling
With the scrolling trigger option, you can define what percentage of the page a user must scroll through before the email subscription form appears.
The goal is to present the form to readers who are engaged with your content and interested in reading more, but may not finish reading the entire blog post or page.
4. After Commenting
If a user comments on your post, that likely means they're engaged and find the content useful.
You can therefore trigger an opt-in form to appear after a user has left a comment in order to increase the chance of conversion.
5. After Purchasing
You can trigger an email opt-in form to display after a user makes a purchase. This is a great way to invite new or existing customers to stay updated on promotional offers and new product releases.
If you are using Bloom plugin on an online shop, this trigger option can be extremely useful for gaining email subscribers and generating sales.
6. After Inactivity
How many times have you opened a website and then gotten distracted by other content or activities?
To recapture the attention of inactive users, the Bloom plugin allows you to configure an email opt-in form so it's triggered after a certain period of user inactivity.
Bloom Plugin Templates
A key highlight of the Bloom email opt-in form plugin is the more than 100 template designs. Each template is fully customizable so you can quickly create an email opt-in form while keeping it on-brand.
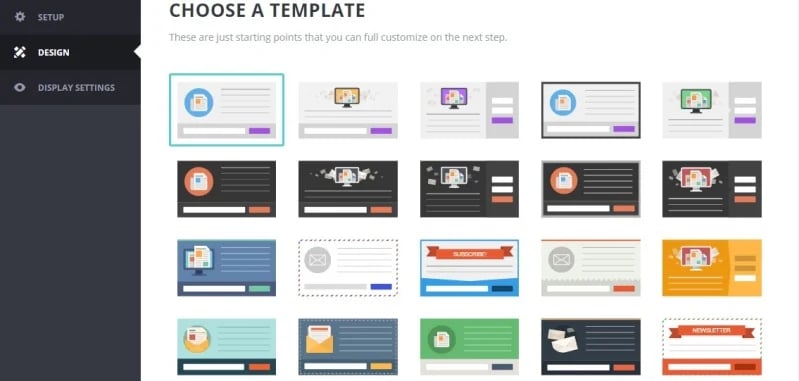
You can modify all of the elements in the Bloom templates, including the title, message, image, animation effects, fonts, and borders and preview the form before you make your final decisions.
If you want even more customization, you can use CSS to modify each template. Here are some of the customization boxes right out of the box.
1. Form Orientations
 Bloom provides you three orientations to choose from: bottom, left, or right. The plugin gives you full control over the number of forms you want to show and over their placements and opt-in types.
2. Unlimited Color Options
Color customization is crucial to an opt-in form’s success. If your form doesn’t complement your brand and website design, it will look out of place and likely not be effective. The Bloom plugin offers unlimited color options to match your forms perfectly to your website.
3. Customized Borders & Edges

A form’s appearance makes a huge difference in conversion rates, because users are less likely to engage with a form that looks odd or spammy. To make sure your subscription form looks exactly how you want, Bloom offers the option to customize the edges of your opt-in form with borders.
4. Image Orientation Options
 Bloom plugin comes with several image orientation options so you can control how images are positioned in relation to text in your opt-in forms. More specifically, you can display an image to the left, right, above, or below text.
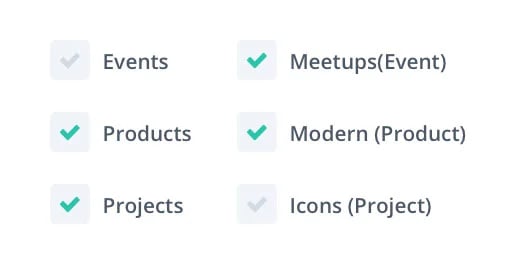
5. Display Settings

Bloom plugin comes with a comprehensive range of display settings so you can control where and when your opt-in form will appear. You can set up the form for the entire site, certain post types and categories, or on a per-post basis.
This can help you target the right visitors at the right time. For example, you may want to only show a locked content opt-in form offering a free ebook to visitors on your blog and not your homepage.
Bloom Plugin Functions
In addition to customization tools for your forms, Bloom also offers several more functions to test your email opt-in forms and analyze their performance.
1. Post and Category Targeting
 As mentioned above, this critical feature offered by Bloom enables you to show post- or category-specific opt-in forms. If you showcase a form with information related to specific posts or categories, users are more likely to find it interesting and engage with the opt-in form.
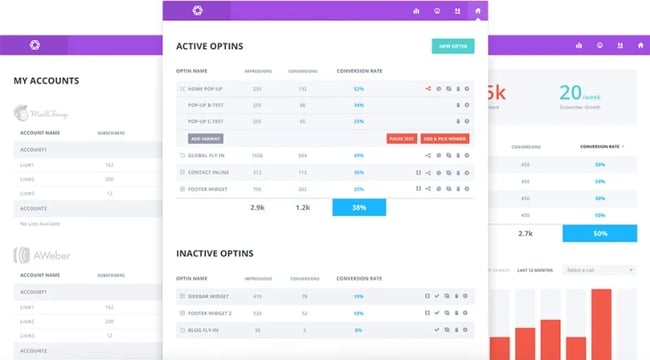
2. A/B Testing
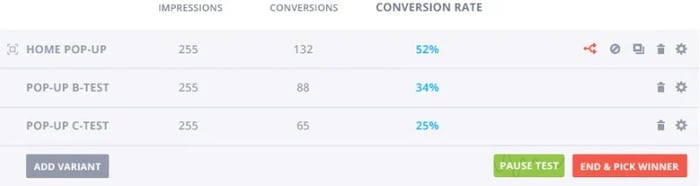
Bloom’s A/B split testing function lets you compare the performance of multiple variations of the same opt-in form to help you find which version is the most effective.
You can do the testing with different sets of options based on triggers, placement, and design of the forms.
3. Mobile Optimization
Nowadays, a huge percentage of any website's traffic comes from small-screen devices — so if your email opt-in form is not optimized for mobile phones, you are going to miss a lot of possible subscribers.
Thankfully, Bloom’s opt-in forms and dashboard are fully responsive and look great all the way down to even the smallest screens.
4. Email Marketing Integration
 The most important factor for an email opt-in plugin is the integration with your email marketing provider. If the plugin can't be integrated with your email marketing provider, there is no point in having an email opt-in plugin. With Bloom, you don't have to worry. It integrates seamlessly with 19 of the most popular email marketing providers, including HubSpot.
5. Detailed Statistics
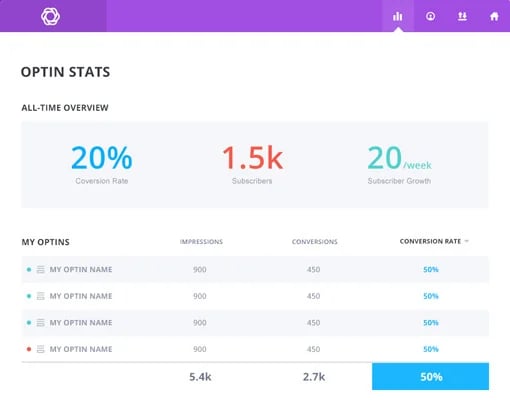 Statistics will help you determine how your email opt-in forms are performing. Bloom comes with a nice statistics interface where you can check the impressions and conversion rates to determine the effectiveness of your forms.
6. Import and Export Bloom Data
 If you're managing more than one site, the import and export option allows you to transfer data from one website to another. This feature can also be used to migrate data for analysis.
Bloom Plugin Pricing
The Bloom plugin can be purchased on its own or as part of your Elegant Themes membership. If you're an existing member, you can simply download the plugin.
If you aren’t a member, you can purchase the developer’s license for $89 annually or $249 for lifetime access. This license also offers access to other flagship products like the Divi theme and Monarch plugin for social sharing.
Invest In Your Business By Implementing The Bloom Plugin
Bloom plugin is a great investment, because its email opt-in forms can help you increase engagement with your users and improve conversion rates.
While there are plenty of free and premium email opt-in plugins on the market, Bloom stands out with its customization options and functionality for analyzing your forms’ performances. If you want to increase sales and/or website traffic and generate more revenue, a high-quality email opt-in form like those made with Bloom is a sound investment.
Editor's note: This post was originally published in March 2020 and has been updated for comprehensiveness.